
Maquillaje con rubor y bronzer
¿La forma más rápida de conseguir un brillo digno de unas vacaciones sin tener que ir a la playa? ¡Con un poco de rubor y bronzer! Después de aplicar la base y el corrector, los productos de maquillaje de rubor y bronzer de Maybelline, disponibles en crema y en polvo, te darán un rubor saludable perfecto y un cutis natural y bronceado. Para añadir calidez y dimensión a cada tono de piel, compra nuestros productos de maquillaje de rubor y bronzer a continuación.
Filtrar por:
1 a 6 artículos de un total de 6
Ordenar por:
- Ordenar por

Preguntas frecuentes sobre rubor y bronzer
Para obtener un brillo radiante y saludable, sigue estos pasos para aplicar el rubor.
- El maquillaje base debe aplicarse primero, usando base y/o corrector para emparejar el color del cutis. A continuación, aplica el bronzer para darle un tono más cálido a tu piel y, luego, aplica un producto de contorno para esculpir más.
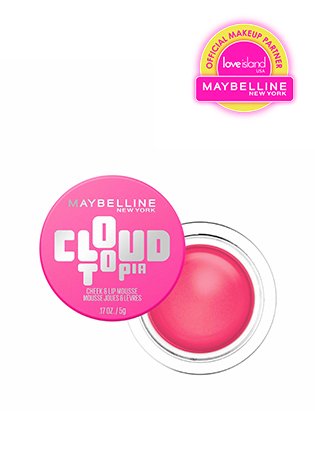
- A continuación, es hora de aplicar el rubor que elijas. Nuestro rubor en mousse para mejillas y labios Cloudtopia es una fórmula de mousse en crema ligera pero muy pigmentada que se funde con la piel para lograr un sonrojo natural. Comienza en las manzanas, la parte redonda y carnosa de la mejilla, y aplica unos pocos puntos de rubor en el pómulo con los dedos. Dale golpecitos en la piel para difuminarlo sutilmente.
- Si quieres alargar y afinar una forma de rostro más redondeada con rubor, concéntrate más en los pómulos en lugar de en las manzanas, pero si quieres un aspecto más juvenil y suave en una forma de rostro angular, las manzanas son donde debes aplicar la mayor parte de tu rubor.
- Si tu objetivo es reducir un poco tu color o si prefieres un look más pigmentado, optarás por una esponja de maquillaje húmeda o tus dedos, o una brocha de rubor mullida/angulada, respectivamente. El uso de una brocha te permitirá aplicar capas para lograr más cobertura mientras que si usas una esponja o tus dedos te ayudarán a integrar el producto en la piel. Aplica el rubor en la piel y difumina hacia atrás hacia la línea del cabello para esculpir y levantar.
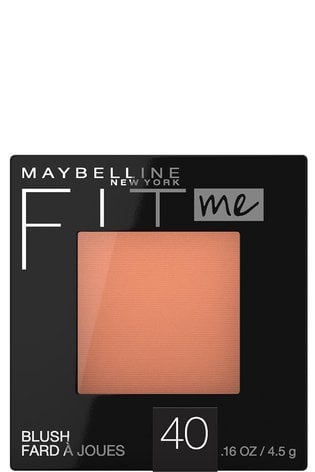
- En función de lo intenso que quieras que sea tu rubor, también puedes usar un rubor en polvo como el rubor Fit Me encima del rubor en crema. Esto añadirá color y ayudará a prolongar su duración.
El bronzer está pensado para dar calidez al tono de tu piel, creando un efecto como si te hubiera besado el sol.
¿No tienes claro cuál es la diferencia entre el bronzer y el contorno? El bronzer sirve para dar calidez a la piel, mientras que el contorno se utiliza para añadir sombras y conseguir un aspecto más esculpido, por lo que ambos productos combinan a la perfección. Por lo general, el bronzer tiene un brillo que aporta un reflejo adicional y un aspecto saludable.
Si quieres que tu bronzer sirva también como contorno para levantar y esculpir la forma de tu rostro, concéntrate en los huecos de tu cara, como debajo de los pómulos, las sienes, a lo largo de los lados de la nariz y la mandíbula.
- Normalmente, el bronzer se aplica después del maquillaje facial (base y/o corrector), pero antes del contorno y el rubor.
- Aplica el bronzer, por ejemplo, City Bronzer, con una brocha grande y tupida en los puntos altos del rostro, como las mejillas, la nariz y la frente, donde el sol impactaría de forma natural.
- Las mismas reglas se aplican al uso de un bronzer en crema. Aplícalo en forma de puntos en estas zonas y, a continuación, difumínalo con una brocha tupida o angular para mayor precisión. También puedes usar los dedos, pero puede que te resulte un poco más difícil conseguir un acabado uniforme y difuminado, especialmente si intentas conseguir un efecto de contorno esculpido.
- Asegúrate de difuminarlo bien en la piel y la línea del cabello para conseguir un acabado natural y bronceado. Hazlo con suavidad y con movimientos circulares, deslizándote a lo largo de la línea del cabello y bajando por las mejillas y la mandíbula.
- Extra: ¡También puedes usar el bronzer en los párpados como sombra de ojos!
¿No tienes claro cuál es la diferencia entre el bronzer y el contorno? El bronzer sirve para dar calidez a la piel, mientras que el contorno se utiliza para añadir sombras y conseguir un aspecto más esculpido, por lo que ambos productos combinan a la perfección. Por lo general, el bronzer tiene un brillo que aporta un reflejo adicional y un aspecto saludable.
Si quieres que tu bronzer sirva también como contorno para levantar y esculpir la forma de tu rostro, concéntrate en los huecos de tu cara, como debajo de los pómulos, las sienes, a lo largo de los lados de la nariz y la mandíbula.
El rubor y el bronzer tienen sus propias ventajas: el rubor aporta un bonito color a las mejillas y el bronzer da calidez a la piel, lo que se traduce en un cutis naturalmente luminoso. El rubor viene en tonos rosa, durazno y bayas para imitar el color que tus mejillas adquieren de forma natural al reaccionar al frío o cuando sales a correr. El bronzer tiene, bueno, un tono dorado y da a la piel un aspecto bronceado, como si hubieras pasado uno o dos días de relajación en la playa. Cuando se usan juntos, crean un brillo saludable y dimensional.
Sí, el rubor y el bronzer están pensados para usarse juntos, pero puedes usar solo uno u otro. El rubor se considera más un producto de belleza para el día a día, ya que aporta color al maquillaje del rostro y ayuda a revitalizar el cutis, para que no parezca demasiado apagado o sin color. El bronzer se puede usar a diario, pero a veces se prefiere como producto de temporada para dar calidez a los cutis pálidos del invierno o para realzar el brillo del verano. Nos encanta la forma en que ambos productos se complementan para dar unidad al look, ya que aportan un brillo radiante al cutis y añaden dimensión y luminosidad.
Si lo piensas como un juego de colorear por número, el rubor y el bronzer son complementarios entre sí: el rubor se aplica en las manzanas de las mejillas y hacia arriba en los pómulos, y el bronzer a lo largo del perímetro de la cara, a lo largo de la frente, justo debajo del rubor y a lo largo de la mandíbula y la nariz.
Para conseguir un aspecto más angular y esculpido en rostros más redondeados, evita aplicar rubor en las mejillas, o aplícalo muy ligeramente, centrándote en la parte superior de los pómulos. Esto ayuda a estirar la mirada hacia arriba, creando la ilusión de longitud. Por el contrario, para rellenar y suavizar rostros más largos y angulares, centra tu aplicación de rubor en las manzanas de las mejillas.
Dado que el bronzer puede crear sombras similares al contorneado, cuando se aplica en las áreas correctas, puedes seguir una aplicación similar. Para rostros redondos, esculpe las mejillas barriendo el bronzer desde la línea del cabello por encima de la oreja y angulándolo hacia abajo por debajo de los pómulos hasta las esquinas de la boca. Para equilibrar una frente más ancha y una barbilla más angulada en una cara con forma de corazón, aplica bronzer en las sienes y los pómulos, con algo en la barbilla y a lo largo de la mandíbula. Las formas más angulares de la cara no requieren tanto contorneado para que la estructura ósea parezca más afinada, sino que se puede usar el bronzer para suavizar los ángulos al difuminarse ligeramente por encima de los pómulos naturales y siguiendo la línea del cabello y la mandíbula.
Sí, Maybelline tiene una paleta de rubor e iluminador. La paleta Facestudio® Master Blush Color & Highlight Kit tiene todo lo que necesitas para crear un look cálido y luminoso. Sus tonos difuminables y modulables te permiten personalizar tu look. Y como hay tres tonos de rubor, desde durazno hasta baya, con un iluminador que combina perfectamente con todos ellos, puedes crear múltiples combinaciones de rubor e iluminador. Esta paleta, fácil de usar, es ideal para llevar contigo, ya que te permite reducir la cantidad de productos que necesitas. Además, también puedes utilizar los diferentes tonos de rubor como sombra de ojos para sacar el máximo partido a tu paleta.
Para obtener el aspecto de una piel bronceada por el sol, los mejores lugares para ponerse bronzer en la cara son los puntos altos, donde el sol impactaría naturalmente. Piensa: en la frente, de mejilla a mejilla, en la nariz, y conecta con la mandíbula para esculpir. Si buscas un efecto más de contorno bronceado, el foco debe estar en esculpir y no tanto en lograr un look bronceado, así que céntrate en aplicar en las sienes y los huecos de las mejillas.
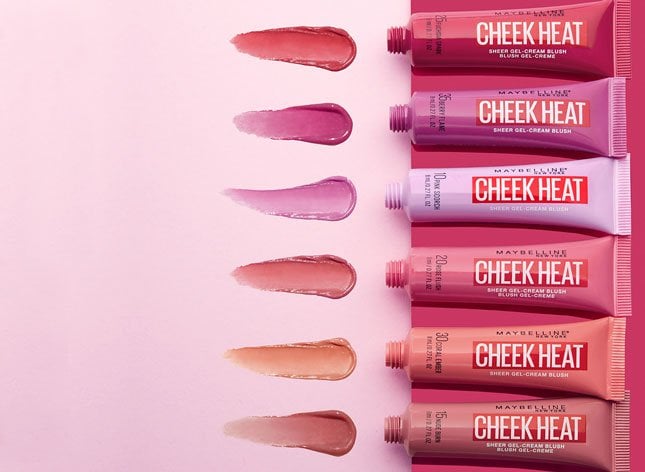
El rubor debe ir directamente en los pómulos para darle un toque de color y un aspecto angular y esculpido, incluidas las manzanas de las mejillas para un rubor natural. El bronzer y el contorno están más orientados a aplicarse debajo del pómulo, ya que añaden dimensión. Si usas un rubor en crema como nuestro Cheek Heat Gel-Cream Blush, también puede ser útil aplicar un bronzer en crema o un contorno, ya que tienen fórmulas similares que interactúan bien juntas. El Instant Age Rewind Concealer es un buen contorno en crema; solo tienes que elegir un producto que sea uno o dos tonos más oscuro que tu tono de piel. Para un dúo de rubor y bronzer en polvo, prueba nuestro Fit Me Blush en los pómulos y City Bronzer justo debajo.
El rubor suele ser una fórmula rosada o de tono rosado destinada a añadir calidez a las mejillas, acentuando los rasgos faciales naturales. Los tonos rosados imitan el rubor natural que adquieren las mejillas y ayudan a crear un cutis juvenil y terso. El rubor combina bien con la base, el corrector, el bronzer y el iluminador para lograr un maquillaje completo que mejora la estructura ósea y proporciona un aspecto saludable.
Que sea mejor el rubor en crema o en polvo depende de tu tipo de piel, así como del look de maquillaje que desees. El rubor en crema, como el Cheek Heat Gel-Cream Blush, es ideal para crear looks frescos, especialmente para aquellas personas con piel seca, mientras que el rubor en polvo, como el Fit Me Blush, te dará un look mate y modulable que combina bien con los tipos de piel grasa. Los dos también funcionan muy bien cuando se combinan para obtener un resultado más pigmentado, lo que prolonga la duración de tu look, ya que el polvo ayuda a fijar la crema. Si quieres la sensación sedosa de un rubor en crema, pero con el acabado sofisticado y difuminado de un polvo mate, te encantará nuestro Teddy Tint, que también se puede usar en los labios.
Sí, se puede usar rubor sin base de maquillaje. Aplicar rubor sobre la piel desnuda permite conseguir un rubor natural sin necesidad de corregir el color ni igualar el tono de la piel. Pero, si lo único que buscas es un poco de color para alegrar un cutis pálido, un toque de rubor en las mejillas puede ser justo lo que necesitas. Aunque quizá no quieras usar ningún otro maquillaje con el rubor, es recomendable combinarlo con un cuidado de la piel adecuado y tal vez incluso con un primer que cuide la piel, como Grippy Serum Up To 24HR Hydrating Grip Primer, que hidrata y ayuda a que el rubor no desaparezca, especialmente si es una fórmula en crema, que a veces se funde demasiado bien con la piel.
Dado que la piel madura tiende a ser más seca, opta por un rubor en crema que hidrate y rellene, pero, lo más importante, que no se acumule en las líneas finas. Nuestro Cheek Heat es una excelente opción, ya que es un rubor a base de agua que rejuvenece y aporta hidratación a la piel seca para un acabado saludable.
Encuentras tu tono de rubor teniendo en cuenta el tono y el subtono de tu piel, pero la forma más fácil es prestar atención al color que toman tus mejillas de forma natural cuando te sonrojas, ya sea cuando haces ejercicio o cuando sientes vergüenza. ¡Ese es la gama de colores que se verá más natural en tu piel! Para aquellos con subtonos fríos, serán los tonos rosados, especialmente los de base azul. Y los subtonos cálidos se verán mejor con tonos más anaranjados, como el coral. Si tienes subtonos neutros, puedes elegir entre tonos fríos o cálidos. Para tonos de piel más intensos, opta por tonos más pigmentados, como bayas o ciruela, para que no se vea demasiado claro o cenizo en tu piel. ¡Tenemos muchos consejos sobre cómo elegir tu color de rubor aquí!
Sí, el rubor tiene el poder de hacerte parecer más joven porque añade color a las mejillas, haciendo que te veas más vibrante. Además, cuando se aplica rubor a las manzanas de las mejillas, da la ilusión de un rostro más voluminoso, que es un amplificador de juventud instantáneo. Y aún mejor si utilizas texturas radiantes o húmedas que, además, te dan un brillo juvenil.
El bronzer hace que la piel parezca bronceada, lo que crea calidez y da la sensación de profundidad y dimensión. El bronzer puede transformar tu cutis, ya que le da un brillo saludable y realza tus rasgos faciales naturales.
Sí, el bronzer es ideal para la piel madura porque ayuda a aportar calidez al rostro para un sutil toque de juventud. Opta por bronzers mates que se fundan suavemente con la piel, en lugar de los brillantes, que pueden acumularse y atraer la atención a las líneas finas. Nuestro City Bronzer es un polvo mate finamente molido con manteca de cacao que se funde con la piel para proporcionar un brillo natural y un acabado aterciopelado.
No, no te pongas bronzer en toda la cara; concéntralo en ciertas áreas para definir, levantar y esculpir. Aplicarlo en los puntos altos de la cara ayuda a que el color bronceado parezca realmente provocado por el sol. El bronzer debe formar parte de una rutina completa para el rostro, que incluya base de maquillaje y corrector como base para uniformar el tono de la piel, y rubor e iluminador para acentuar aún más los rasgos faciales.
Aunque tanto el contorno como el bronzer están pensados para ser más oscuros que el tono de tu piel y añadir dimensión al rostro, la diferencia entre ambos radica en su color y su ubicación. El contorno suele ser de tonos más fríos para añadir sombras y profundidad a los puntos huecos del rostro, como debajo de los pómulos y las sienes de la frente. El bronzer tiene un tono más cálido y se aplica en los puntos altos, como la frente y las mejillas, para dar calidez al cutis. City Bronzer es un excelente bronzer mate en polvo que se puede utilizar para contornear y broncear, según dónde se aplique. Si se utiliza como contorno, es recomendable utilizar una brocha angular para definir. Sin embargo, si lo utilizas como bronzer, es mejor utilizar una brocha mullida para darle un aspecto más difuminado. Instant Age Rewind Eraser Multi-Use Concealer es otra fórmula que se puede utilizar de ambas formas, eligiendo un tono o dos más oscuros como bronzer y quizás un tono más oscuro que ese para el contorno. A continuación, aplícalos estratégicamente para crear profundidad y un brillo bronceado.
La finalidad del rubor es añadir algo de color a las mejillas, lo que realza al instante el cutis y te da un aspecto saludable y descansado. El rubor está disponible en diferentes tonos de rosa, coral y baya, según tu tono de piel, y realza tus rasgos faciales, lo que aporta juventud a tu piel.
Los diferentes tipos de rubor incluyen polvo, crema y líquido, y debes elegir qué fórmula utilizar en función de tu tipo de piel. Los formatos en crema y líquido se funden perfectamente con la piel y proporcionan un acabado luminoso y radiante, ideal especialmente para aquellas personas con piel seca o madura. El polvo te proporciona una cobertura más modulable y es más adecuado para aquellas personas con piel grasa o mixta.
Elige el tono de bronzer adecuado seleccionando uno o dos tonos más oscuros que tu tono de piel natural. También puedes tener en cuenta tu subtono, sin elegir un tono demasiado frío si tienes subtonos cálidos y viceversa. Sin embargo, dado que el bronzer está pensado para dar calidez a la piel, muchos tonos de bronzer tienden a ser más cálidos, con subtonos neutros a cálidos, lo que favorece a la mayoría de los tonos de piel.
Sí, el bronzer se puede utilizar para contornear cuando se aplica en determinadas zonas y con un pincel aplicador más específico. Si aplicas el bronzer como tal, conseguirás un contorno sutil, pero no tan notable como con un producto específico para contornear. La mayor diferencia radica en el tono de los productos de contorno y bronzer: las fórmulas de contorno tienden a ser más frías y los bronzers, más cálidos. Nuestro City Bronzer y nuestro Instant Age Rewind Eraser Multi-Use Concealer pueden servir para ambos fines cuando se aplican en zonas como los puntos altos del rostro para broncear y los huecos como las sienes y debajo de los pómulos para contornear.
El mejor bronzer para pieles claras es uno que sea más claro y de tono más neutro, para que no quede naranja. Prueba City Bronzer en 100 (claro), que es un buen bronzer de tono claro que le dará calidez a tu piel de forma natural, en lugar de parecer un mal bronceado artificial.
Si un bronzer mate o brillante es mejor, depende de tu preferencia personal y del tipo de piel. Un bronzer mate añade definición natural y es bueno para los tipos de piel más maduros, ya que el brillo puede asentarse en las líneas finas. Sin embargo, uno brillante puede ser excelente para dar un acabado radiante y bronceado, ya que refleja la luz para dar más brillo, un poco más de glamour. Nuestro Lifter Stix Multi-Use Face Stick es mate, pero en crema, por lo que se funde a la perfección con la piel, dejando un acabado bronceado pero saludable, lo que permite su uso como bronzer o contorno, según dónde lo apliques en el rostro.
Hay muchas formas de hacer que tu rubor dure más. En primer lugar, debes saber que las diferentes fórmulas de rubor tienen diferentes duraciones. La crema tiende a derretirse en la piel y se vuelve más sutil a lo largo del día, mientras que el polvo es modulable y puede durar más tiempo. Otra opción: ¡aplícalos en capas! Primero un rubor en crema para un acabado similar al de la piel, y luego un rubor en polvo sobre la parte superior para agregar pigmento, y fijar el rubor en crema para que dure más tiempo.
Usar un primer antes del resto del maquillaje también marcará una gran diferencia en la duración de tu look. Nuestro Grippy Primer se adhiere a los productos de maquillaje que colocas encima, manteniéndolos en su lugar, y nuestro Poreless Blurring Primer suaviza la piel para un acabado similar a un filtro que también fija el maquillaje en su lugar. Si prefieres un aerosol fijador, puedes incorporarlo como último paso para crear una capa protectora sobre el maquillaje, evitando que se desvanezca o se transfiera. Para un acabado más radiante, elige nuestro Facestudio Glass-Skin Dewy Makeup Finishing Spray, o para un acabado mate, prueba nuestro Facestudio Lasting Fix Makeup Matte Finishing Spray.
Usar un primer antes del resto del maquillaje también marcará una gran diferencia en la duración de tu look. Nuestro Grippy Primer se adhiere a los productos de maquillaje que colocas encima, manteniéndolos en su lugar, y nuestro Poreless Blurring Primer suaviza la piel para un acabado similar a un filtro que también fija el maquillaje en su lugar. Si prefieres un aerosol fijador, puedes incorporarlo como último paso para crear una capa protectora sobre el maquillaje, evitando que se desvanezca o se transfiera. Para un acabado más radiante, elige nuestro Facestudio Glass-Skin Dewy Makeup Finishing Spray, o para un acabado mate, prueba nuestro Facestudio Lasting Fix Makeup Matte Finishing Spray.
El mejor rubor para la piel grasa es un rubor en polvo de larga duración con un acabado mate, como Fit Me Blush, que controlará el brillo y no se deslizará de tu piel. Para prolongar la duración del rubor y evitar que la oleosidad arruine tu look, aplica un aerosol fijador mate como FaceStudio Lasting Fix Makeup Matte Finishing Spray como último paso.
En primer lugar, identifica la forma de tu rostro. ¿Tienes el rostro redondo, ovalado, cuadrado, en forma de corazón o de diamante? Para conseguir un aspecto más angular y esculpido en rostros más redondeados, evita aplicar rubor en las mejillas, o aplícalo muy ligeramente, centrándote en la parte superior de los pómulos. Esto ayuda a estirar la mirada hacia arriba, creando la ilusión de longitud. Si tienes una forma de rostro más alargada y angulosa, como ovalada o cuadrada, aplicar rubor en las mejillas y difuminarlo hacia arriba y hacia fuera hará que tu rostro parezca más lleno y suave. Para los rostros en forma de corazón, prueba la técnica de drapeado del rubor, que consiste en crear una forma de “C” invertida alrededor de los ojos y hacia abajo por las mejillas para crear más equilibrio.

ENTÉRATE DE TODO
Regístrate para recibir las últimas noticias sobre lanzamientos de productos, consejos y tendencias de maquillaje, sorteos y más.